Instructions for adding data to RetroBioCat
Step 1 - Assign yourself a paper
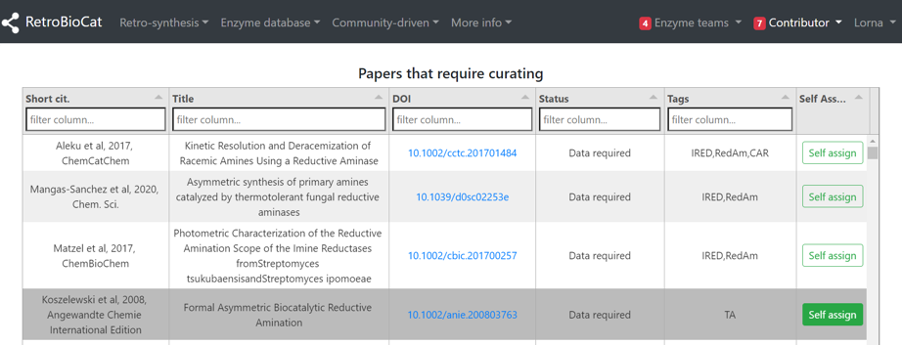
Under “Contributor”, select “Papers to be curated”.
Select “Self assign” to assign your chosen paper to yourself.
Papers can be filtered by enzyme type by using the “Tags” field.
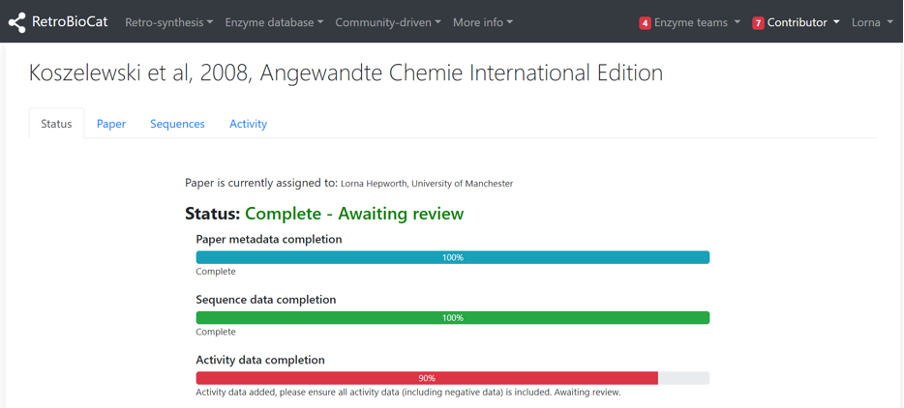
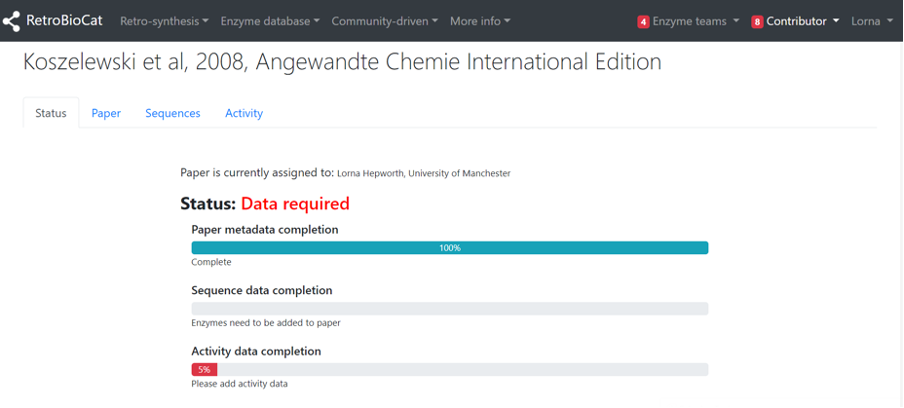
Once you’ve assigned a paper to yourself you will be directed to that paper’s landing page, which consists of 4 tabs. The “Status” tab describes the current state of the data deposition, with the most basic state being that the paper metadata (citation, DOI, date published etc) has been added.
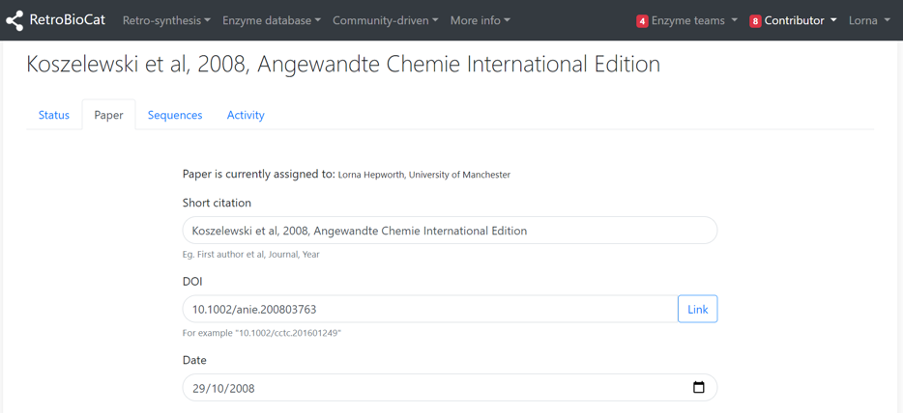
The “Paper” tab contains all of the metadata for the paper. This is extracted automatically from Pubmed or Crossref using the paper’s DOI, and you should not need to edit it. You can use the “Link” button to launch a new tab of the paper for your consultation (subject to journal access permissions).
Step 2 - Add enzyme sequences
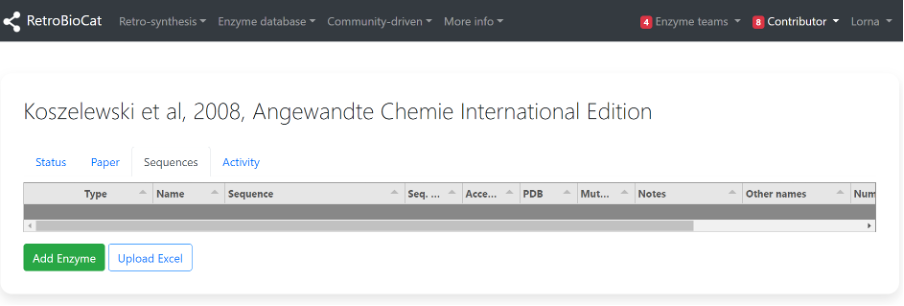
The “Sequences” tab is where the information related to the enzymes used in the publication is stored.
Sequences should be added prior to adding activity data.
Click “Add Enzyme” to begin the process of adding an enzyme.
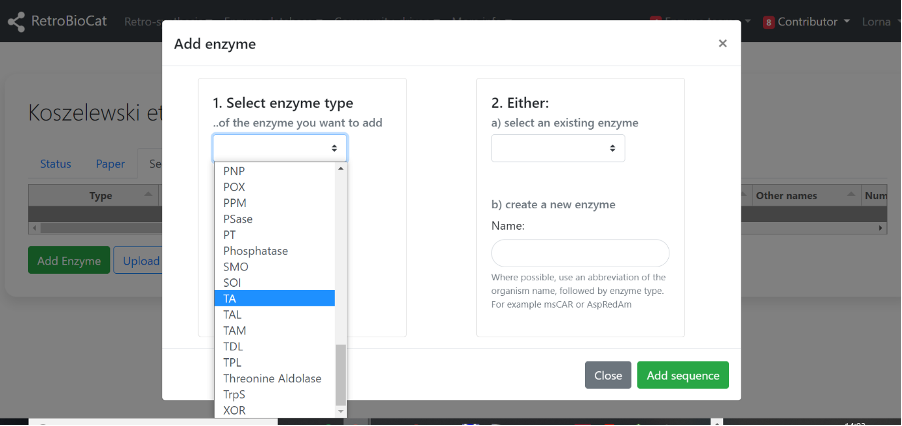
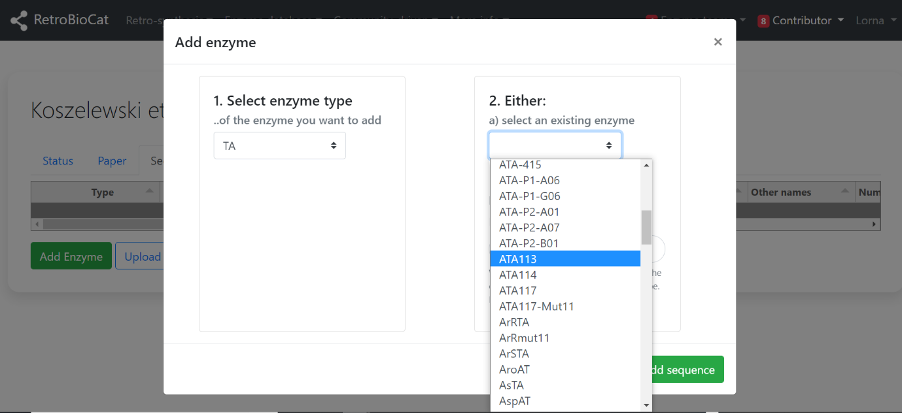
A) Next, check to see whether the enzyme is already present using the second dropdown menu.
If it is present, select it from the dropdown menu and click “Add sequence”.
This will also save you having to add any additional enzyme data, as it should already be present.
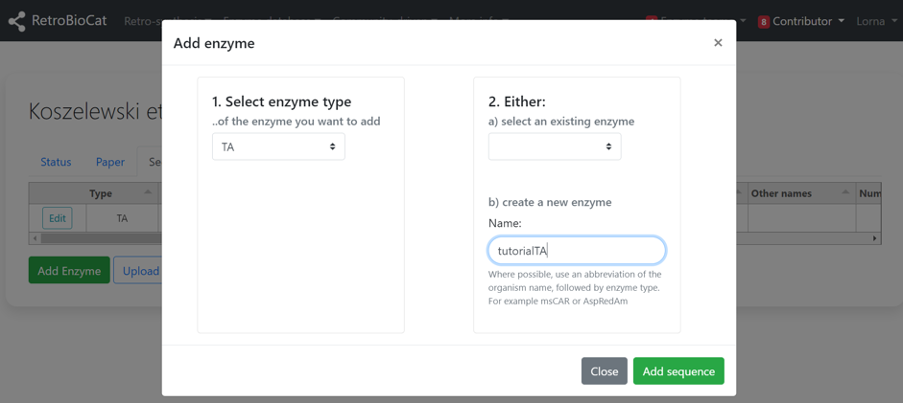
B) If the enzyme of interest was not present in the second dropdown menu, enter it as a new enzyme in the box. Where possible, use an abbreviation of the organism name, followed by enzyme type. For example msCAR or AspRedAm. Click “Add sequence”.
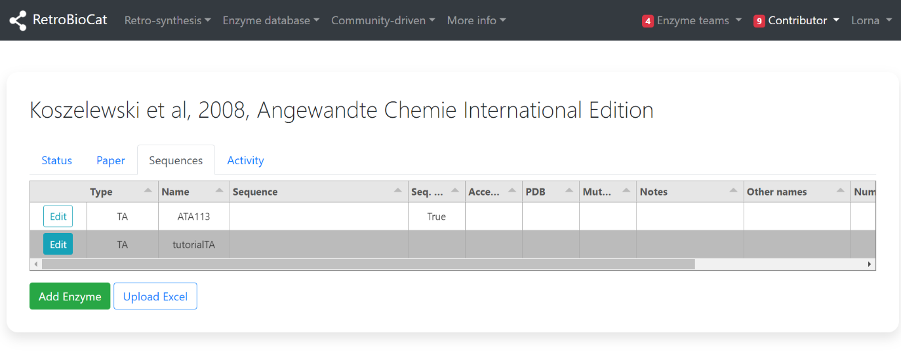
Your new or selected enzyme should now be visible on the “Sequences” tab.
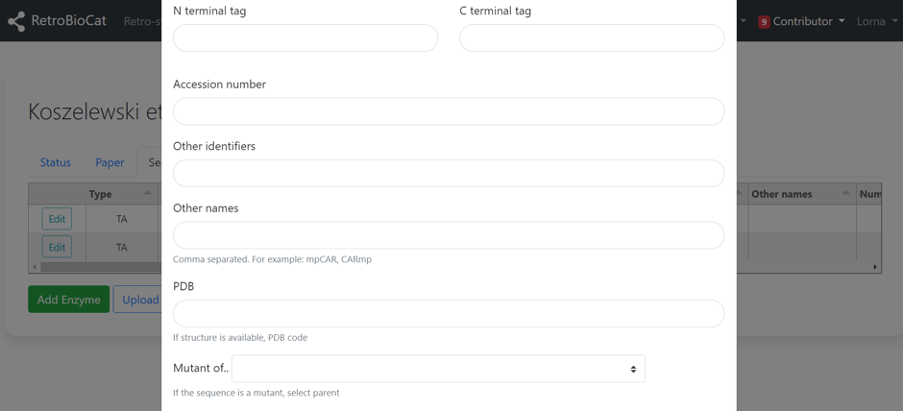
If available, additional information about the enzyme should now be entered.
For example, information on amino acid sequence, accession number, mutant information etc.
Click “Edit” on the relevant enzyme entry to begin.
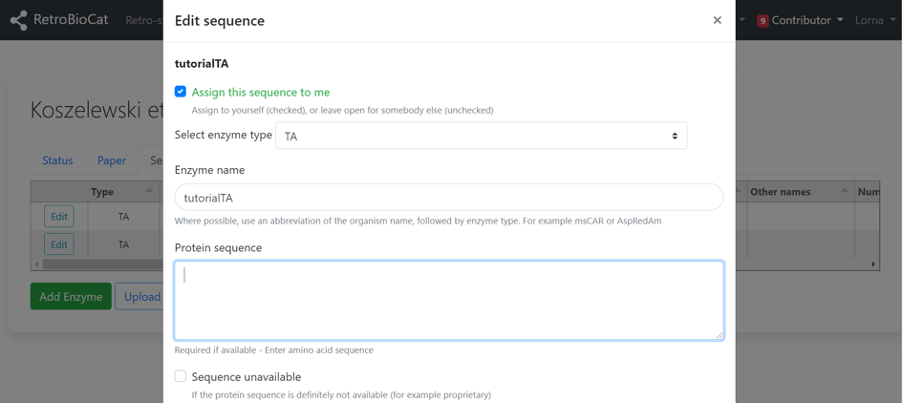
Sequences you have added will be assigned to you. You will only be able to edit these sequences (initially).
Fill in the fields with as much information as possible.
If the protein sequence is available (either directly from the publication, or via accession codes provided in the publication),
enter it in the “Protein sequence” field.
If the sequence is unavailable (e.g. if the sequence information is proprietary), tick the “Sequence unavailable” box.
Enter N- or C-terminal tag information, accession number (e.g. Uniprot, GenBank), other names or identifiers of the enzyme, PDB code, mutant information, and any other notes you think are relevant.

Once all the enzymes in the paper have been added, it's time to add activity data..
Click on the “Activity” tab.
Step 3 - Add activity data
The following instructions detail how to add activity data via the web interface.
Some users may prefer to create an excel file with their data in it, and upload this via the
Upload Excel button.
A template is available within the upload pop-up, or
here.
Click “Add row” to add an empty row to the table.
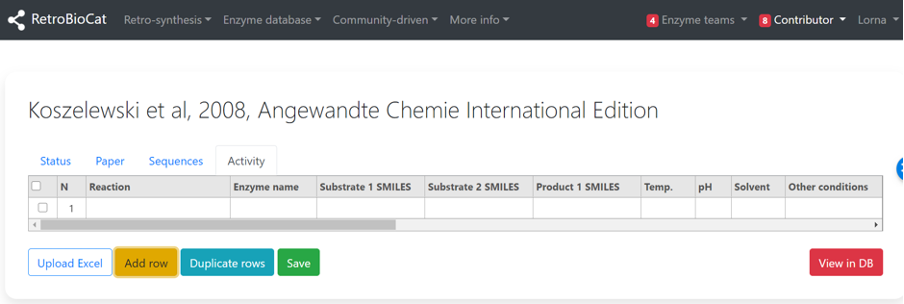
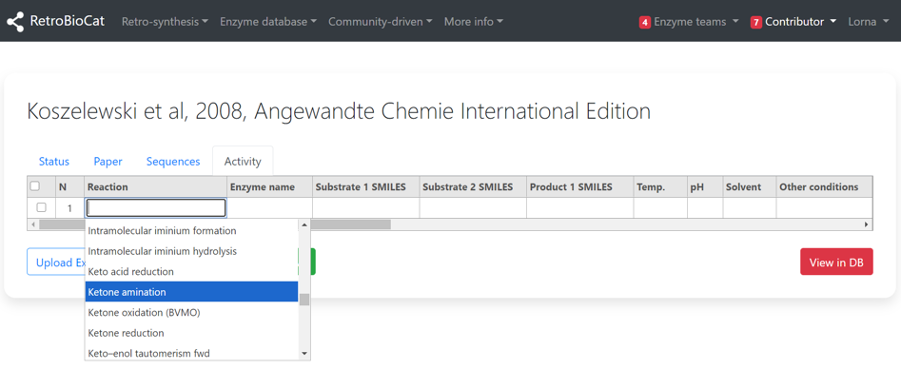
Use the “Reaction” dropdown menu to select the relevant reaction type for the data entry you are adding.
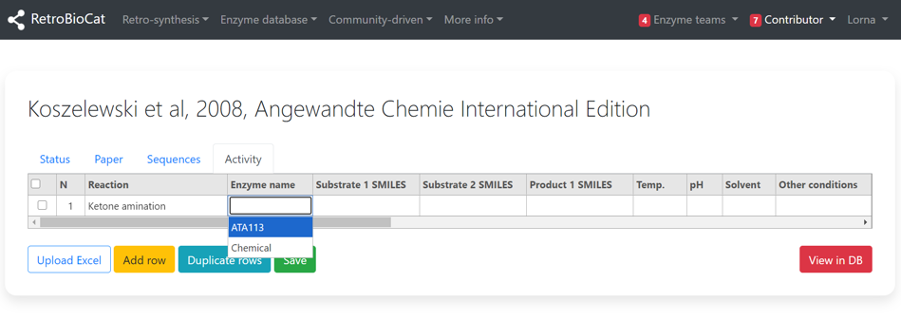
Select the enzyme that is catalysing the chosen reaction from the “Enzyme name” dropdown menu.
Only enzymes that you have added to the “Sequences” tab will be available here.
Choose “Chemical” if the transformation you are describing is a chemical step.
Details of chemical steps covered, and their names, can be found
here.
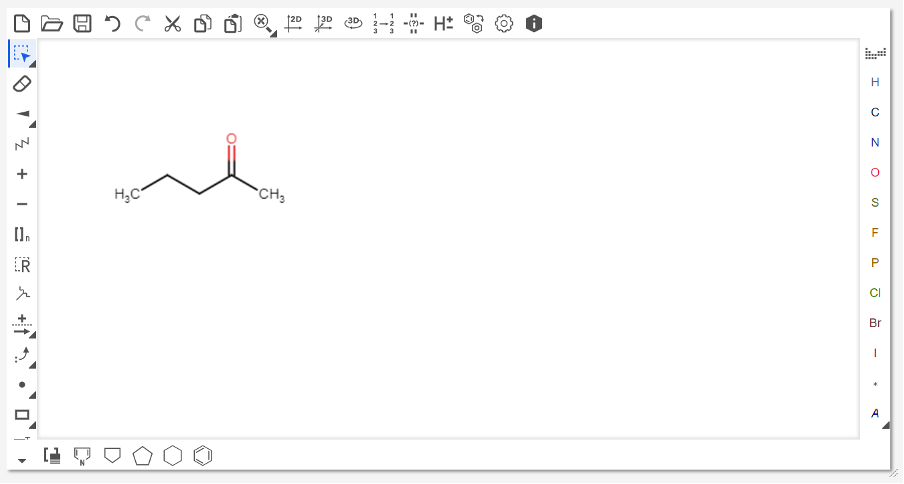
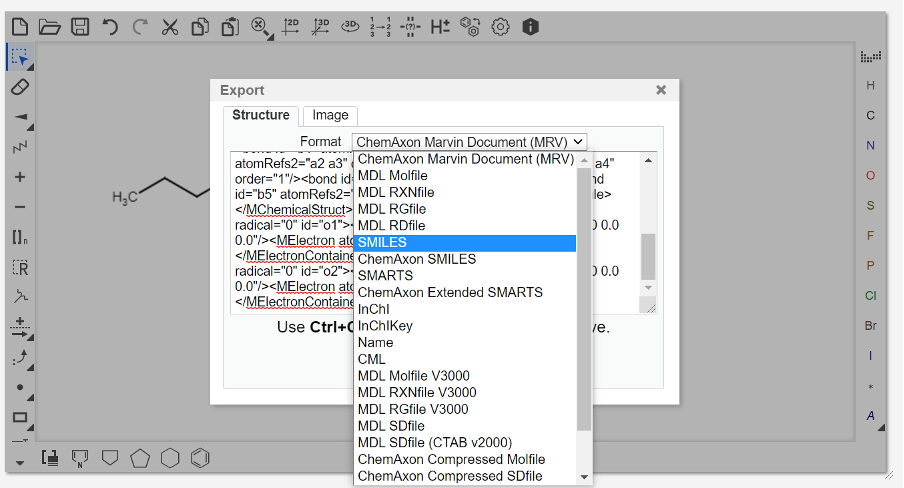
To add SMILES information for the substrate(s) and product of your chosen transformation, you first need to generate SMILES strings for the molecules. This can be done a number of ways, but a convenient method is the use of MarvinJS.
Copy the SMILES string and paste it into the “Substrate 1 SMILES” field of RetroBioCat. Repeat the above directions to get SMILES strings for the second substrate (if applicable), and the product.
For simplicity, RetroBioCat is structured to allow only a single product per reaction.
For reactions that have two products of interest (e.g. lipase hydrolysis), each product should be added as a separate row using the same substrate.
If the second product is not of interest, this can be ignored.
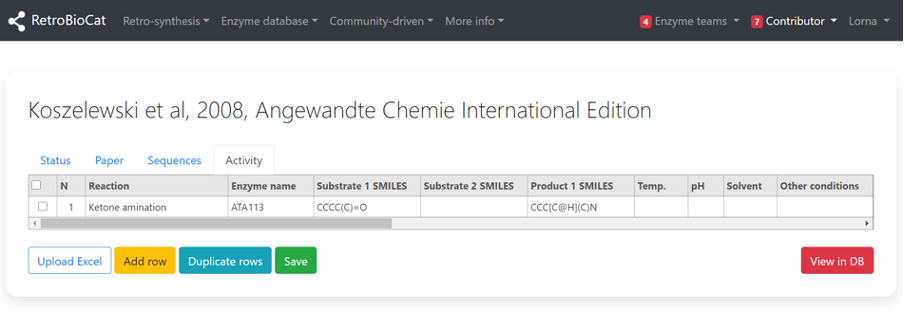
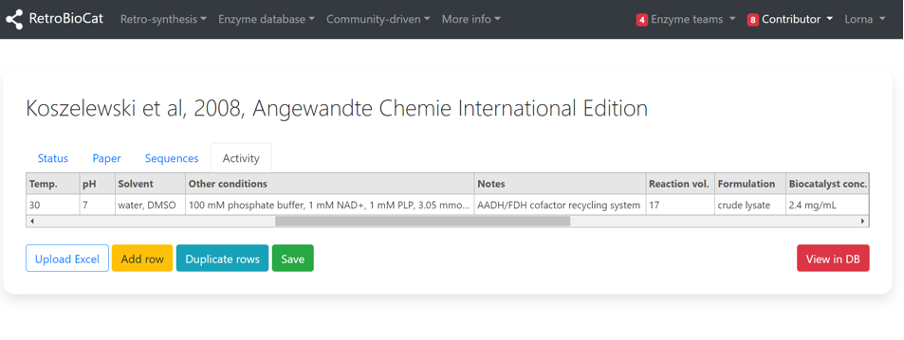
Enter details about the reaction conditions in the relevant fields, including any other “Notes” about the experimental design that you think are relevant.
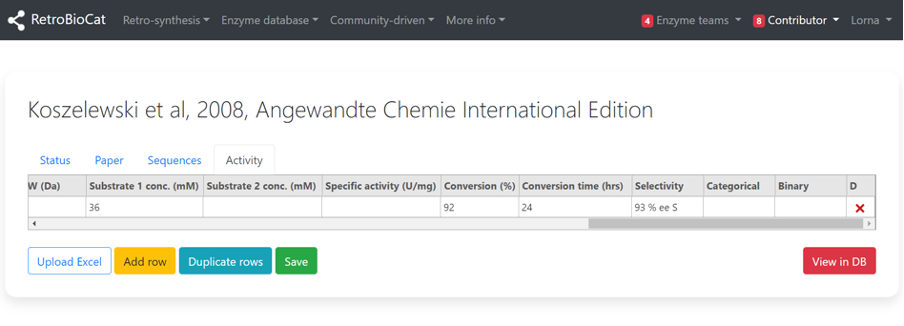
To enter details related to the reaction outcomes, you must first identify what type of data you are dealing with.
This can be kinetics data, specific activity data, or % conversion data (publications often cover more than one type).
- If kinetics, add relevant details in the “kcat”, “KM” and “MW” fields.
- If specific activity, add relevant details in the “Specific activity” field.
- If % conversion data, add relevant details in the “Conversion” field.
If no kinetics, specific activity or conversion data is presented in the paper you are working from, enter either “Categorical” (e.g. High, Medium, Low, None) or “Binary” (1 or 0) information.
- Categorical information is typically extracted from colorimetric screens, or data presented within a heat map
- Binary information is the bare minimum, enter a 1 if the product was seen at all and 0 if no product was seen
Data will automatically cascade down the levels upon saving.
For example, a specific activity more than 0.01 will be marked as binary 1.
Therefore, only one type of data is required per row.
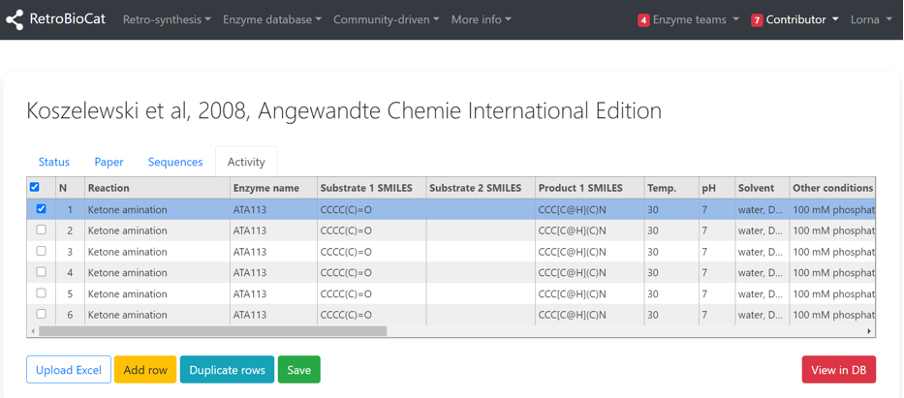
If the paper you are adding data from has several similar examples (e.g. a substrate screen), it is possible to duplicate rows to avoid re-entering experimental conditions. To do this, select the row of interest using the checkbox, and click “Duplicate rows” until you have the desired number of duplicated rows..
Be sure to remove reaction outcome information or SMILES that no longer apply to the new data entries.
When you have added all reaction data from the publication, click “Save”.
Navigating back to the “Status” page of the paper, you will see that the status has been updated.
Congratulations, the data you added will be incorporated into the RetroBioCat database, pending review and approval!
